|
0 Comments
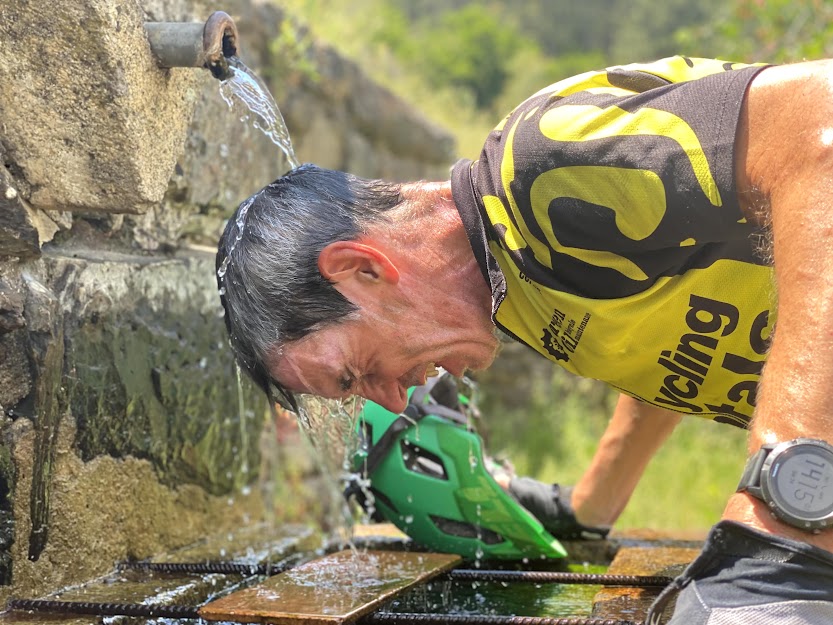
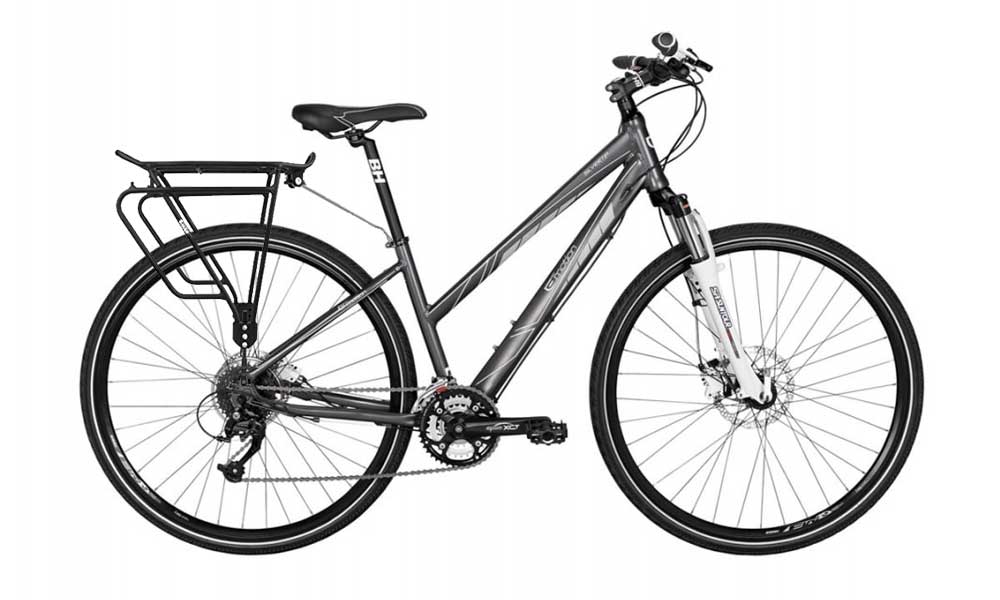
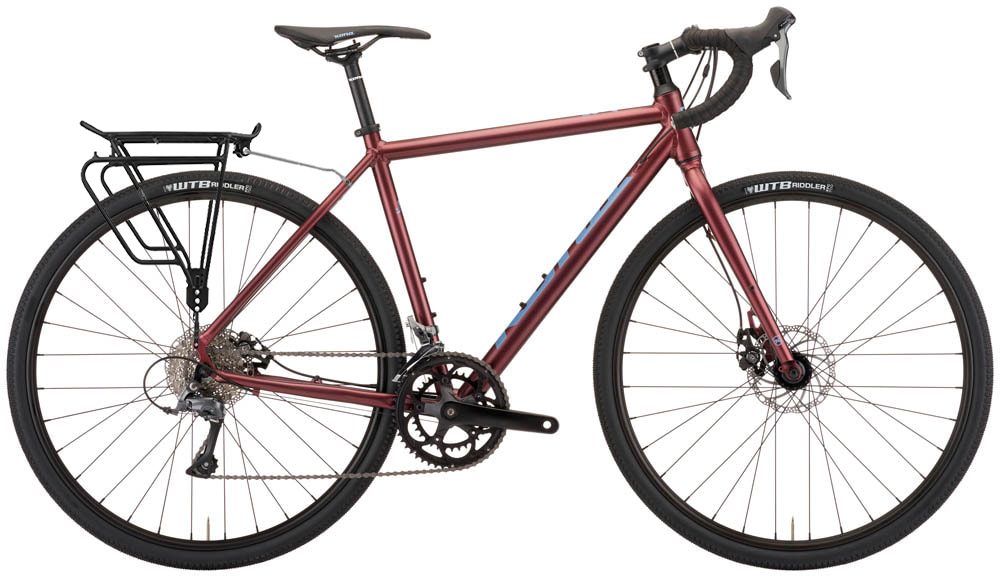
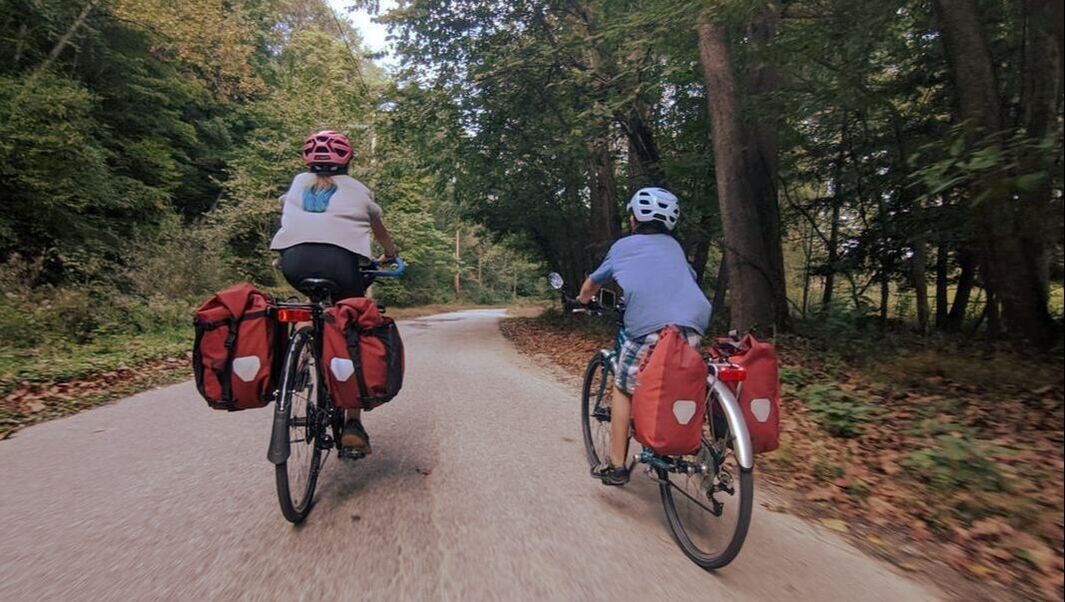
Cycling in hot weather can be challenging, especially if you’re not used to it. It is important to take precautions to ensure you stay safe and healthy when cycling in hot weather. There are ways to make your cycling experience much more pleasant even during the hottest months of the year! Keep reading for our top seven tips for how you can keep cool when cycling in hot weather... Table of ContentsPlan your routeBefore you head out for your ride, you might want to make sure you know the route you are planning to take. This can be especially important if the weather is extremely hot. Consider bike touring routes that take you closer to the coast, or that ensure you can cool off in a swimming pool or river at the end of the day's ride. Make sure that you plan a route that will allow you to find cooler and more shaded areas to ride in. You want to make sure you plan to cycle in an area that will be comfortable to ride during your chosen dates. If you’re not sure where you can find cycling routes that are cooler, we offer some suggested bike touring routes in Spain and Portugal. There are tons of different maps out there that can help point you in the right direction. Find a route that tells you areas that are the most suitable for cycling in the heat, and what the best months are for that specific destination. Dress for hot weatherWhen riding a bike, it's important to always dress for the weather conditions. If it's warm, then you will find it easier to change into more comfortable and breathable clothes. Wearing clothes that are too thick or heavy can increase your body temperature and make you feel even hotter than you are. You’ll also be more likely to sweat in heavier clothing, which can be uncomfortable and even dangerous in the heat. When dressing for hot weather, you want to wear light and loose-fitting clothing. I prefer cotton over synthetic material for very hot cycling conditions. More on that later on. You also want to wear clothing that has a high level of breathability, which will allow your body to release some of the built-up heat. It can be a good idea to wear fabrics that are designed to wick away sweat and moisture from your body, as this will keep you feeling cooler and drier overall. Ride at the right time of dayYou may feel too hot for comfort during the heat of the day in a place with extreme heat. If you can, try to ride during the early morning or late afternoon hours. This will give you a chance to avoid riding in the heat of the day and it will help keep you a bit cooler. If you have to ride in the heat of the day, it will be beneficial to find shade as often as you can. That might be a shady forest, an old barn or a shaded part of towns and villages you are cycling through. Avoid cycling at peak heat and sunlight hours. There is a common misconception that the hottest time occurs during midday, while the coldest time occurs at midnight. The hottest time of the day usually occurs between 3 pm and 4:30 pm, 3-5 hours after noon (when the sun is at its highest point in the sky), when the radiant heat absorbed by the sun is radiated back out from road surfaces and rocks and the like. Keep hydratedWhen cycling in hot weather, it’s very important to remember to stay hydrated. You may even feel like you have a lower need for water when compared to riding in cooler weather. However, this is not the case. In fact, you may require more that twice as much water as normal when cycling in hot weather. You might need to carry additional water with you when cycling in hot weather to avoid dehydration, this is especially ture if you are covering long sections, far from towns or villages, as can happen alongparts of the Camino de Santiago. Make sure that you are drinking plenty of water before, during, and particularly after your ride. Drinking smaller quantities more frequently at shorter intervals is more effective than drinking large amounts infrequently. On very hot days, you will loose more salts through increased sweating, so you must also replenish electrolytes, and often the fastest way to do so is with a good isotonic product. I prefer adding isotonics to a separate water bottle, either as a powder or tablets. So if you do choose to carry a sports drink, do make sure to drink plenty of plain water as well! Don’t be afraid to take a breakIf you are cycling in hot weather, you may find that you need to take breaks more often than you do when cycling in cooler weather. This is completely normal and you should never feel ashamed or embarrassed to take breaks when you need to! If you are feeling really hot and dehydrated, you might want to consider taking a break more often than usual and even hold off finishing the ride util later in the day when the temperature has dropped. There is no shame in stopping for water, food, or to take a break from the heat. If you don’t take breaks when you need to, you could end up passing out and getting seriously hurt. This happens to the best. Taking breaks when you need to can help you avoid passing out from dehydration or overheating. It can also allow you to start your ride fresh and energized. Pack for the heatIf you plan to cycle in a place that experience really hot weather, then you pack accordingly, with supplies that can help you stay cool. There are a number of things you can pack in your bag to keep you cool and comfortable when cycling in hot weather, I personally favour cotton over synthetic material for very hot cycling conditions, as it allows sweat and water to evaporate more slowly, prolonging the cooling. You can check out our brief article on packing for the the Camino, which offers a good outline of what to pack for a bike tour with all weather conditions. When cycling, you will likely sweat and may even become dehydrated. If you don’t carry a water bottle with you, you may not get the hydration you need and you may start to become overheated. You can also pack a snack or two in your bag, consider fresh rather that dried fruit for very hot rides. Eating can help to keep your energy and hydration levels up, and it can also help to keep you cool. Certain foods, such as watermelon and fruits and veggies that hold a lot of water will help hydrate you and help cool you off. Hot days are also great excuses to treat yourself to some gelato - I certainly do! It's also best to lay off the alcohol during the day, and save up for a post-ride glass of crisp white or green wine, a G&T or an ice cold beer as a reward for you efforts! ConclusionWhile hot weather can be challenging and uncomfortable, it doesn’t have to end your cycling season. With the right precautions, you can easily stay safe and healthy when cycling in hot weather. The most important thing you can do when cycling in hot weather is to remember to stay hydrated. You can also wear light and loose-fitting clothing, ride in the morning or late afternoon hours, and find shade as often as possible. Stay cool and comfortable by packing your bag with supplies that can help you stay cool, and don’t be afraid to take a break when you need to. If you want to tour, but you’re not sure which type of bike is right for you, you’re not alone. Choosing the perfect bike for your trip can be an overwhelming task. There are so many options and variables to consider. Are you looking for a gravel bike, a mountain bike, a hybrid bike, a touring bike, a trekking bike, or a road touring bike? Read on to understand the differences and make an informed decision on how to pick the right touring bicycle for you! Table of ContentsHow Do You Want to Tour?Before you start looking at bikes, you’ll want to determine how you want to tour. Do you want to ride long distances? Are you interested in more challenging climbs? Do you want to experience different terrains? Do you want to ride through cities and towns? Or do you want to ride away from main roads on unpaved or gravel roads? Whether you’re interested in gravel biking, mountain biking, or a hybrid bike, there are specific features to look for depending on what type of bike you’re interested in, and I have tried to break down the differences as clearly as possible below: Touring BikesTouring bikes are characterized by their more upright riding position, wide rims, and drop, flat, riser or butteryfly handlebars. Usually, such touring bicycles come in men's and women's specific frames. They are most often equipped with wider tires suitable for paved and unpaved roads. Many touring bikes also feature front suspension for a more comfortable ride, and all touring bikes must include mounting points for racks to carry panniers and other accessories.
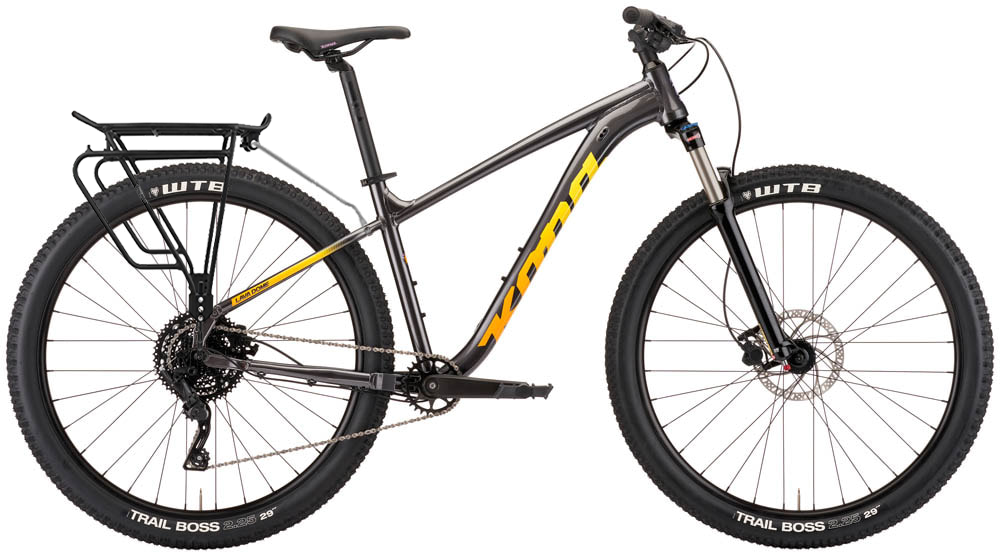
Although a typical touring bike weighs around 15 kg unloaded, they usually feature a wide range of gears to make cycling on hilly and flat terrain equally accessible. Touring bikes are designed to be versatile and durable, ideally using mid-range componenents which are easy to replace anywhere in the world, which makes them ideal for long-distance touring on mostly paved roads. Trekking BikesTrekking bikes are essentially touring bikes, with a more off road design - and largely a marketing designation. Just like touring bikes, they are designed to provide support for heavy loads, or for riders that want a bike that will be able to handle their camping gear or other supplies. They have a sturdy frame and wide, mixed surface or off-road tires to handle both paved and unpaved surfaces. Trekking bikes also feature racks and front or rear suspension and usually also include mudguards. Mountain BikesMountain bikes are designed to ride over a variety of terrain and tackle steeper hills and mountains, thanks to generously low gears. They feature wide rims, knobby tires, and suspension, which improve handling and maneuverability off road and increase the comfort of the off road ride. Mountain bikes are commonly equipped with suspension forks and additionally rear shocks for increased control and smooth riding on uneven surfaces.
Mountain bikes are typically heavier than road or hybrid bikes, but can easily be equipped with pannier racks make great touring bicycles, for comfortable use on all types of terrain from cobbled roads to forest trails, even when fully loaded. This makes them ideal for bike tours with over 50% unpaved roads. Gravel BikesGravel bikes are specifically designed to ride comfortably on unpaved and gravel trails. They are essentially road bikes, with wider, off-road tires and wider handlebars, and a slightly reinforced frame. While gravel bikes are normally slightly heavier than road bikes, they provide a bike that’s perfectly suited for a long-distance ride or for touring on and off paved roads.
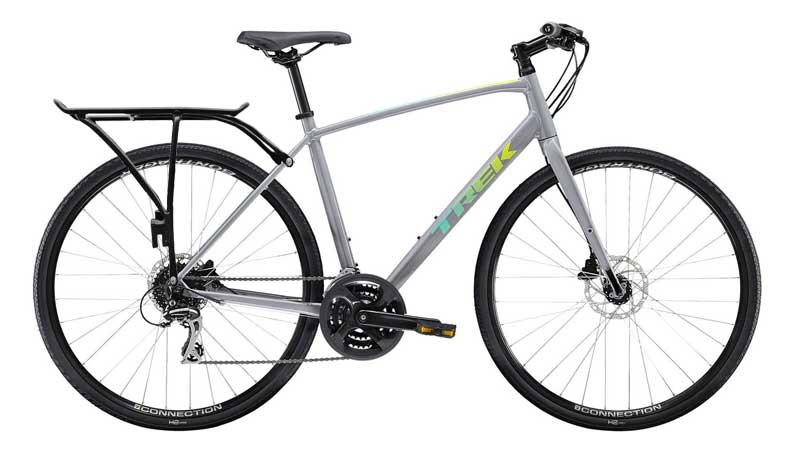
Gravel bikes have a wide, low stance for increased stability and the ability to tackle all types of terrain. They feature wider rims, knobby tires, and wide handlebars to reduce vibration and provide a comfortable ride when riding over rough trails. Gravel bikes are normally designed with more rack and accessory mounting points than road bikes, making them the right choice for riders exploring smoother unpaved roads on their bike tour. All our gravel bikes come equipped with a rear rack and optional handlebar bags and rear panniers - but you can use your own bikepacking specific bags too! Hybrid bikesHybrid bikes are a combination of mountain, road, and gravel bikes. They have a hybrid frame and components, which combine the best qualities of different types of bikes to create the perfect, light touring bike. Hybrid bikes feature a rigid frame and ridgid fork, which aim to reduce weight. They also feature wider rims and mixed surface tires.
Hybrid bikes typically offer a more comfortable upright seated position for long-distance touring, and are ideally suited to paved roads and smoother terrain. We designate our hybrid bikes as "Light touring bikes", and they are popular for their lower weight and comfortable ride. Choosing the Right Bike for YouTo make an informed decision on which bike is best for you, you’ll need to consider where you want to ride and what style of bike touring suits you best. The best way to do this is to think about what type of touring you want to do and what type of bike you think will best suit your needs. As you consider your options, keep in mind that not all bikes are made for every type of bicycle touring. For example, if you’re interested in riding through cities, you may prefer a road bike or a hybrid, light touring bike. If you’re looking for a bike that’s best for long-distance touring off the beaten track, however, you want to look at gravel, mountain or suspension touring bikes instead. If you're still not sure what bike is best for you, don't worry, we are here to help, so just reach out below! 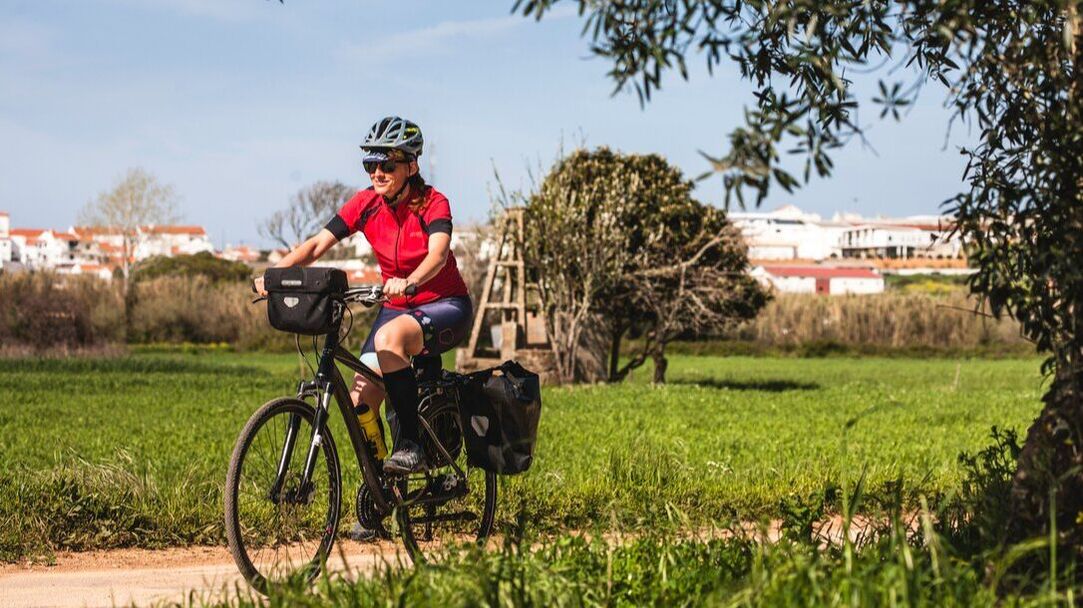
Travelling in the South of Portugal by Cycling Through the Centuries
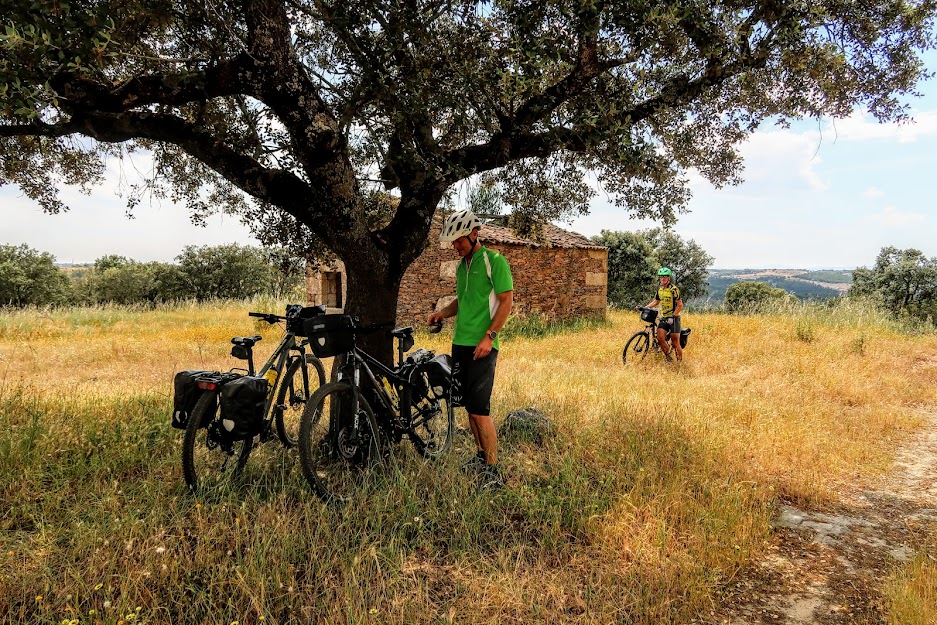
If you're looking for an unforgettable experience, self guided bike tours are just the thing. Self-guided bike tours are a great way to explore the world around you because you have greater opportunity to interact with your environment.
You can also take your time to stop and explore an area that otherwise might not have captured your attention, all while rolling at a pace faster than walking, but slower than driving: the perfect balance in my opinion! It might sound intimidating, but don't worry! This beginner’s guide will give you all the information you need to go on a self-guided bike tour. From what route is best for beginners, to what you need to pack and also safety considerations. The basics of self-guided bike tours
Self-guided bike tours are a great way to explore the world around you because you have greater opportunity to interact with your environment. You can also take time to stop and explore an area that otherwise might not have captured your attention.
You need a good level of fitness, but you don't need a lot of experience to embark on a self-guided bike tour! In fact, if you're new to biking, this is a great way to start out.  The first thing you'll want to do is make sure you know how to use your bike properly and perform some basic maintenance. It's important that you know how it feels to ride a bicycle with some luggage on varied terrain. There's a difference between the feel of a road or mountain bike, so make sure you understand which type of bike will suit your route, well before departure. Once you have an understanding of the appropriate bicycle for your type of bike tour, find the perfect route for beginners. What Bike Touring Route is Best for Beginners?
When you're preparing for a self-guided bike tour, one of the most important decisions you'll have to make is what route to take. A good beginner's self guided bike tour could have you cycling between three to five hours hours a day, with a straightforward route and with easy navigation and limited hill climbing.
There are many factors that will go into this decision including how much time you have, your fitness level, and your preference, but you can start off with making 1 of 2 choices: Loop or Point-to-Point.
Aim to avoid busy roads and industrial - or excessivly hilly areas unless you're riding an ebike! Each option has its unique advantages and considerations, making them suitable for different types of cyclists and tour goals. Point-to-Point RoutesAdvantages:
Considerations:
Loop Ride RoutesAdvantages:
Considerations:
Choosing between a point-to-point and a loop ride route depends on your personal preferences, logistical capabilities, and the type of adventure you're seeking. But here's my tie-breaker: Loop ride tours are great for beginners because they simplify arrival and departure logistics considerably and therefore may not require as much planning. Also if you need to stop riding halfway through because it's too difficult or you tire out before reaching the end it's easier to return to the start point.
Point-to-Point routes are often better for more seasoned riders who are accustomed to covering greater distances, who want to explore larger areas and are happy managing begining and end of tour logistics like trains or transfers.
What to Wear on a Bike Tour?Choosing the right clothing for a bike tour is crucial for comfort, performance, and protection. Start with moisture-wicking base layers to keep sweat away from your skin and prevent chafing. On very hot days however, I prefer cotton or another slower wicking fabric to enhance cooling! Padded cycling shorts can be essential for long rides, providing cushioning and reducing saddle discomfort. I personally prefer slick lycra boxer type shorts under light, washable baggy shorts and a touch of skin balm rather than padding! Opt for a breathable, lightweight jersey with pockets for easy access to snacks and small essentials. Layering is key, so bring a lightweight, packable rain jacket for unpredictable weather and a windbreaker for cooler conditions.
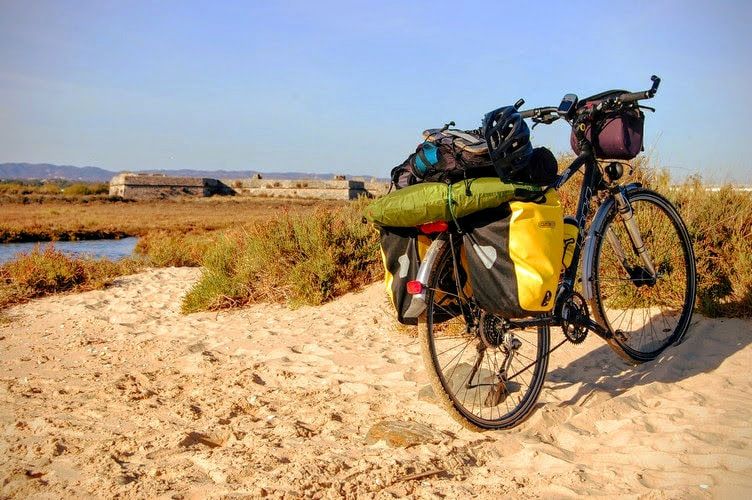
Don't forget a good pair of cycling gloves to protect your hands from sun and road rash, and enhance grip, and a helmet for essential safety. Sunglasses will shield your eyes from the sun, wind, and debris, while a buff or bandana can protect your neck and face from the elements. Lastly, wear comfortable, moisture-wicking socks and sturdy cycling shoes suitable for your pedal type to ensure maximum efficiency and comfort on the road. These days I opt for comfortable hiking sneakers with a firm sole so I can easily hop off my bike and explore towns. It may sound obvious, but do pack cycling clothes that are appropriate for biking, but also pack after riding clothes that can get dirty or that are easy to wash and dry. What to Pack for a Bike Tour?
Before you start your tour, make sure you've got the right gear:
If you are "credit card touring" and staying in hotels, often a single set of cycling clothes will last you several days or weeks with nightly washing and overnight drying. Consider that your after ride clothes are worn on a clean body for a few hours each day only. Just make sure you have a spare jersey and shorts in wet weather when you may need to change into dry gear half way through the day.
Rest stop on a bike tour in the Algarve in southern Portugal When you're planning what to pack, think about what items might be essential based on where you're going. For example, extreme cold or heat, long hot climbs, long cold descents or longer distances between rest stops. These things must be considered when you pack your gear.For example, if you'll be in a hot climate, sunscreen is an absolute must! If you're going somewhere with a chance of rain, bring appropriate clothing and a rapid change of wet gear. You can find a detailed bike tour packing list here.
Pro Tip: Pack your panniers or bags in chronological layers. For example, I always pack my after ride sandals and wash kit near or at the top of my panniers, and always have a light rain jacket in my bar bag for instant access.
Hydration and Nutrition for BeginnersEmbarking on a bike tour is an exciting adventure, but maintaining proper hydration and nutrition is crucial for an enjoyable and successful journey. Start your ride well-hydrated by drinking plenty of water the day before and the morning of your tour. Aim to drink small amounts of water regularly during your ride, about one bottle per hour, and consider adding electrolyte tablets to your water to replenish lost salts and minerals, especially in hot weather. Fuel your body with balanced meals and light snacks. Begin with a carbohydrate-rich meal a few hours before your ride, and during the ride, opt for easily digestible snacks like energy bars, bananas, fruits and nuts every 45 minutes to an hour.
After your ride, focus on recovery by consuming a snack with a rougly 3:1 carbohydrate to protein ratio, followed by a balanced evening meal. I particularly love a lighter combination Portuguese soups and petiscos or a variety of tasty tapas at the end of the day, rather than a heavy meal. Embrace the local cuisine along your route for a more immersive experience, but be cautious with raw or very rich foods to avoid stomach issues. Planning ahead for water refill points and carrying lightweight, non-perishable snacks will help keep you energized and hydrated throughout your adventure. By prioritizing these essentials, you'll ensure a smooth and enjoyable bike tour. Safety on a Bike Tour
Safety should always be your number one priority and nothing should ever deter you from taking the necessary precautions. It's important to wear a helmet, follow traffic laws, and make sure you can be seen on or off the bike. I recommend wearing a bright colored jersey, wind breaker or helmet in any weather.
Beyond road safety, some destinations are clearly safer for beginer bike tourers than others. We are experts in bicycle travel in Spain and Portugal and over they years we have observed that male and female cyclists alike have excellent experiences in both countries.
Look for destinations with friendly and welcoming cultures and good infrustrutures for visitors for the best experience as a newbee bike traveler!
If you follow the rules of the road and use some common sense, bike tours are very safe if you just take these few small precautions. Beginner Bike Touring FAQsQ: What should I pack for our trip? A: Pack essential items like plenty of water, electrolyte tablets or sports drinks, and a variety of your favourite snacks like energy bars, bananas, nuts, and dried fruits. Additionally, bring a small first aid kit, sunscreen, a multi-tool for bike repairs, spare tubes + patch kit, a lightweight rain jacket, comfortable clothing, and a map or GPS navigation device. Pro Tip: If you're using a cell phone or GPS device for navigation, be sure to bring spare batteries or a power bank! Q: What's the typical amount of snacks and water that most people need to bring? A: Most cyclists aim to drink about one bottle of water (500-750 ml) per hour of riding. For snacks, plan for a small, easily digestible item every 45 minutes to an hour. This might include 2-3 energy bars, a few pieces of fruit, and a handful of nuts or trail mix for a half-day ride. Adjust based on your personal needs and the duration of your tour. Pro Tip: If you are cycling in a fairly populated area, you can and should buy fresh snacks like fruit and sandwiches daily or even hourly! Q: Is there anything that people seem to forget to pack that I should make sure we have? A: People often forget electrolyte tablets, which are crucial for maintaining fluid balance and preventing cramps in hot weather seasons. Also, ensure you have a small first aid kit, sunscreen, lip balm, a basic repair kit with tire levers and a pump, and an extra layer of clothing for changing weather conditions. Pro Tip: Bring a couple of plastic bags for wet or very dirty clothes so you don't mess up the rest of your gear! Q: Do most travelers carry a backpack with them for their rides? A: While some cyclists prefer a hydration pack or small backpack, most seasoned riders use bike-mounted storage options like saddlebags, handlebar bags, or frame bags to keep their bodies lighter, cooler and more comfortable. Let your bike carry the load! Pro Tip: You will almost invariably overpack so create a checklist and remove unnecessary items. Quick Tips for Bike Touring Routes
Self-guided bike tours are a great way to explore the world's most beautiful destinations. Here are 3 broad and simple tips for beginner cyclists to make their first self-guided bike tour a success:
1) Start with an easy and travel friendly destination, where you won't find yourself hopelessly out of your depth if things go wrong. Namely healthcare, basic sanitation and alternative transport options in case of breakdowns - mechanical or personal! You can find some of our favourite beginner friendly and recommended bicycle tour routes in Spain and Portugal here.
2) Look for routes that avoid major roads and highways, to avoid traffic hazards, but that lead you to interesting destinations so you never feel too far from civilization - or that all you do is pedal without engaging with locals! 3) Consider Logistics, Points of Interest, Distance and Elevation gain. When will you go? Where will you stay? Where will you be able to buy provisions? What is there to see? How far do you want to cycle each day? How much do you want to climb each day? Also think about terrain (paved or unpaved), time available for your bike touring adventure, and seasonal weather conditions.  You need to be sure you are fit enough to cycle the full distance of the tour, while taking into account that the challenge level is not just the distance cycled, but also the elevation gain for the days ride. I also recommend allowing sufficient time to actually enjoy the rides and also your overnight destinations - and points of interest along the way! Many inexpereinced bicycle travelers overlook this and end up going home tired and underwhelmed simply from riding too late into each day.
Although most people prefer spring and summer for the better weather conditions, we have many experienced cyclists who prefer cycling in autumn and winter, and risking a little rain so they can avoid crowds.
Cycling Rentals has been designing and operating bike tours for nearly 20 years, and we can help you choose or plan your perfect self guided bike tour - get in touch. In the mean time, click below for some inspiration! 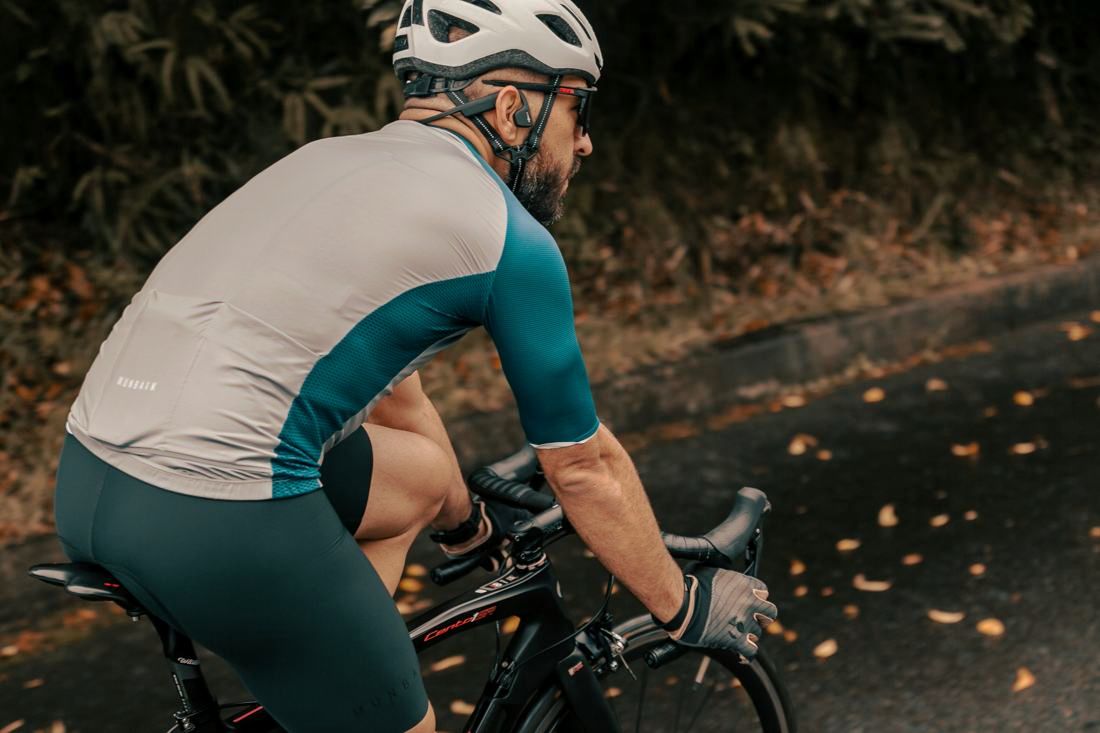 Photo by Munbaik Cycling Clothing from Pexels Cycling is one of the best ways to get around for short distances, and it's also a great way to stay fit. But what's the point if you're not comfortable? There are plenty of choices in cycling clothes these days, but the sheer number of options can be overwhelming. Here are 6 simple tips to help choosing clothes that will make cycling even more enjoyable. The Importance of ComfortComfort is extremely important when it comes to cycling clothes. If you're not comfortable, you won't want to keep riding your bike! Many cyclists will tell you that breathable fabrics are a must, which is true for summer months. But don't forget about the rest of the year. For winter cycling, synthetic fibers and wool clothing will keep you warm and dry. And if you have sensitive skin, you'll need to find clothing made from soft materials like cotton or synthetics. But what about your feet? Cycling can sometimes be uncomfortable on your feet because it puts pressure on the balls of your feet. To avoid this, wear shoes with grippy soles (like sneakers) or invest in cycling-specific shoes The Right Type of MaterialThe material you choose for your cycling clothes is going to make a huge difference in how comfortable you feel on the bike. Most of your clothes should be made out of a stretchy, breathable fabric that will not restrict any motion or sweating. When picking a cycling shirt, look for materials that are fitted and have short sleeves to avoid discomfort from riding with long sleeves. You also want to avoid fabrics that are too heavy, as they'll hang around you and cause chaffing. For pants, try out different types of materials like denim, polyester, and lycra. Ditch the jeans and go for synthetic pants that will wick sweat away from your body and keep you dry on those hot days! 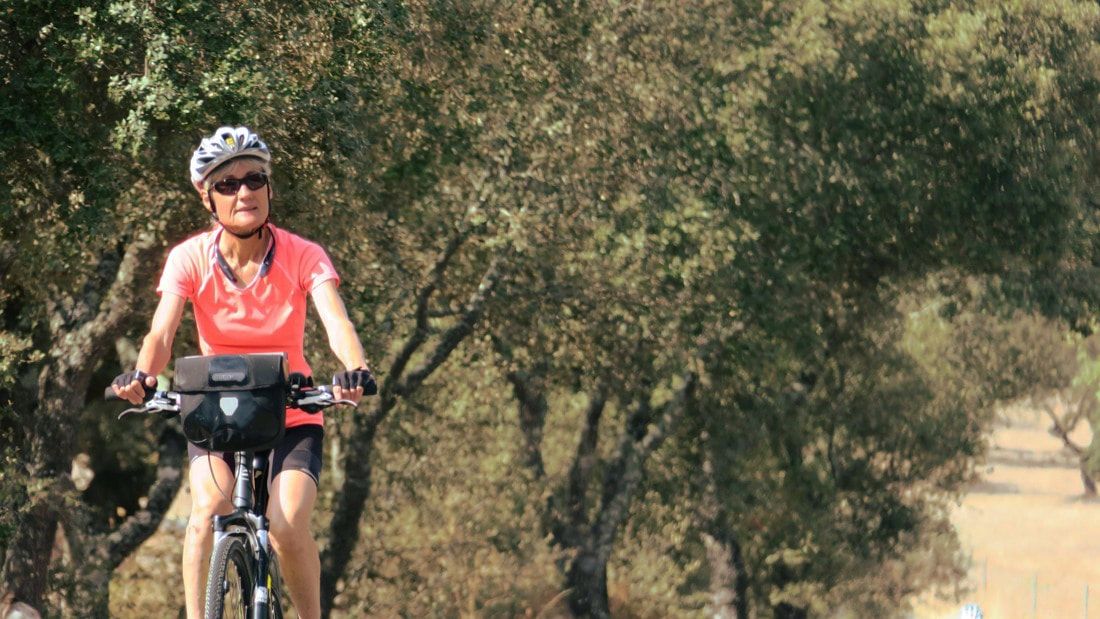 Choosing the Right Cycling ShortsChoosing the right cycling shorts begins with your bicycle. If you're riding a bike with a narrow saddle, then you'll want to wear bike shorts that are more form-fitting than loose-fitting. But what about comfort? There are so many factors to consider when choosing clothes for cycling. First, make sure the waistband of your shorts isn't too tight. It should be snug enough to stay in place without cutting into your skin or feeling too tight on your stomach. You also want to make sure there's enough room around the crotch area - if it feels like you're sitting on the seam of the shorts, they're probably not comfortable enough for cycling! If you're looking for style, there are plenty of options available on the market today. Cycling clothing designers offer different cuts and lengths to try and accommodate different body types and tastes. Choosing the Right Cycling Jersey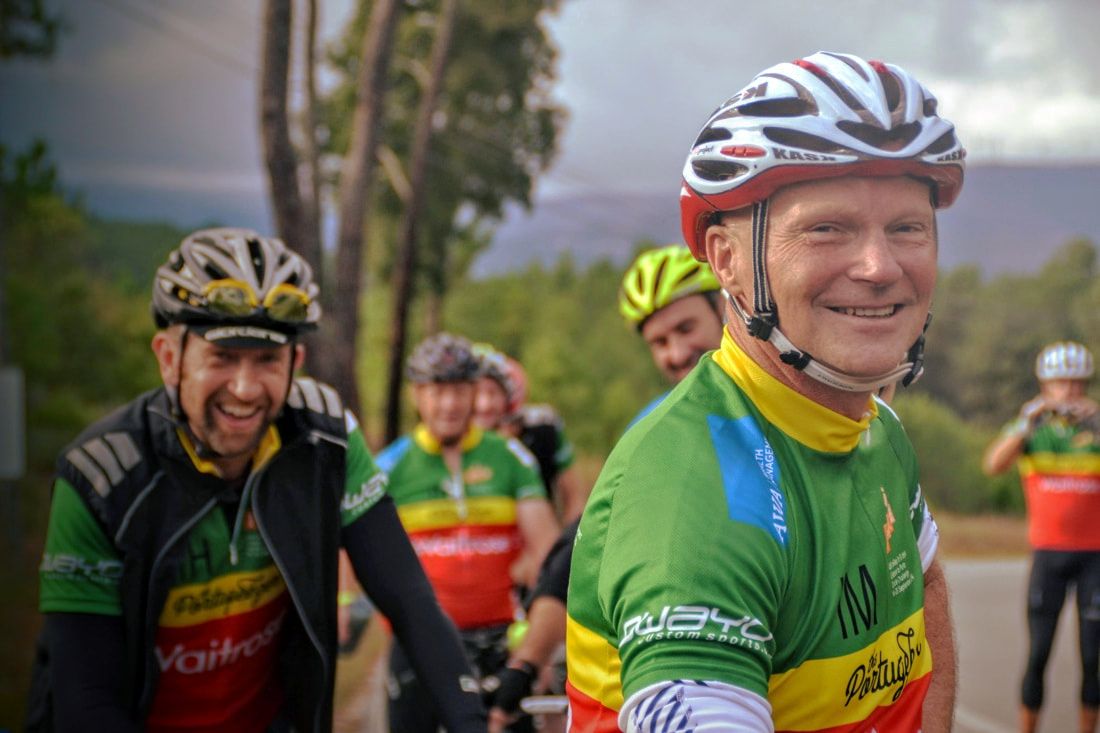 Cycling jerseys are one of the most important pieces of clothing you can wear. This is because they're designed to be tight-fitting, so they won't ride up when you're cycling and cause discomfort. There are a few different types of cycling jerseys available on the market, from long-sleeved tops to short-sleeved tops with a variety of colors and designs. But don't worry about choosing a jersey based on what's in fashion. Choose your jersey based on what will work best for you and your body type! Short sleeves might be more comfortable in hot weather, but if you have larger arms or broad shoulders, long sleeves might be better for you. Try out different types of cycling jerseys to find out which one works best for you. Choosing the Right Cycling Jacket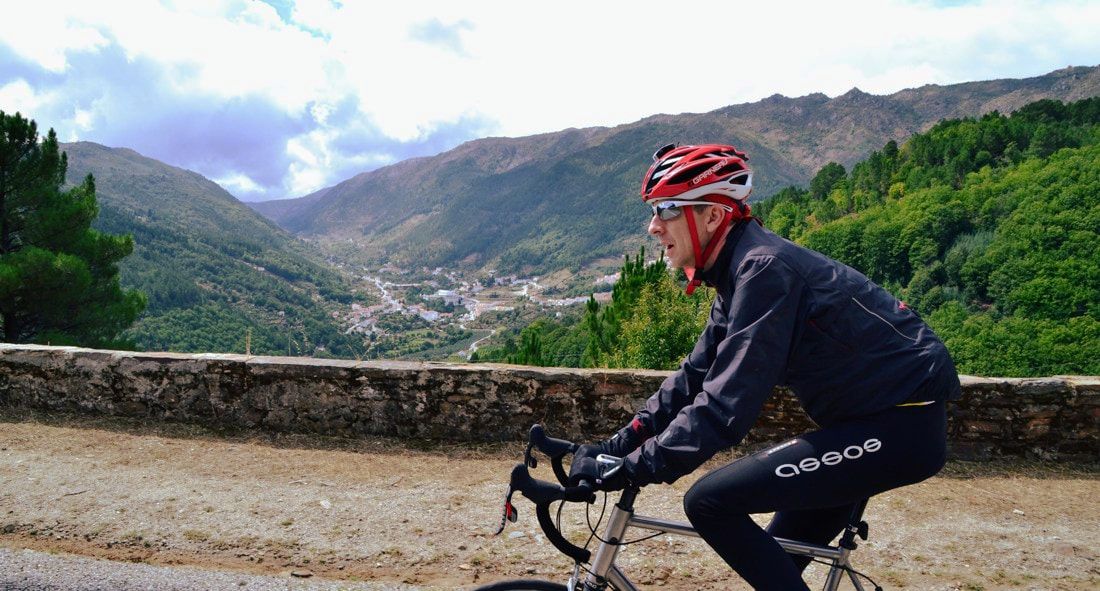 Jacket breathability is essential for comfortable cycling. If your jacket doesn't breathe well, you'll end up feeling like a sweaty mess. That's why it pays to choose a material that will wick away sweat and keep you cool. Plus, there are plenty of other features that can make a cycling jacket more comfortable. Zippered pockets are a great idea if you plan on carrying anything with you while cycling, and they also allow you to store your belongings without fear of them falling out. Elastic waistbands help cover your stomach and back from the wind, which is especially important on colder and windier days. Whatever jacket you decide to buy, make sure it's made from a breathable material with pockets and an elastic waistband! Choosing the Right Eyewear and GlovesIf you'll be cycling in generally clear weather, sunglasses are a great idea. They keep the sun out of your eyes and make it easier for you to see traffic. They can also save you from insects and debris flying into your eyes. I recommend choosing glasses with polarized lenses as they work well in changing light conditions and with the added benefit that you can often spy fish swiming under the shimmering sea if you are cycling by the sea! Gloves are also a must-have for cycling. If you're going to ride any significant distance, it's worth investing in gloves with gel padding and breathable fabric. This will help protect your hands from wind and cold and reduce hand fatigue as well as making your hands more comfortable on the handlebars. Extra Tip: Don't forget your Helmet!You might not think of your helmet as an accessory, but it's an essential part of cycling safety. To find the perfect helmet, you'll need to find one that fits comfortably. It should sit level on your head without tilting forward or back. The straps should form a Y shape under your ears, and it should be snug but not tight. When you shake your head, the helmet shouldn't move. The best time to wear your helmet is before you get on the bike, not after! We do offer high quality, fully adjustable, EU certified helmets for rent in 2 sizes, if you would rather save space in your luggage! 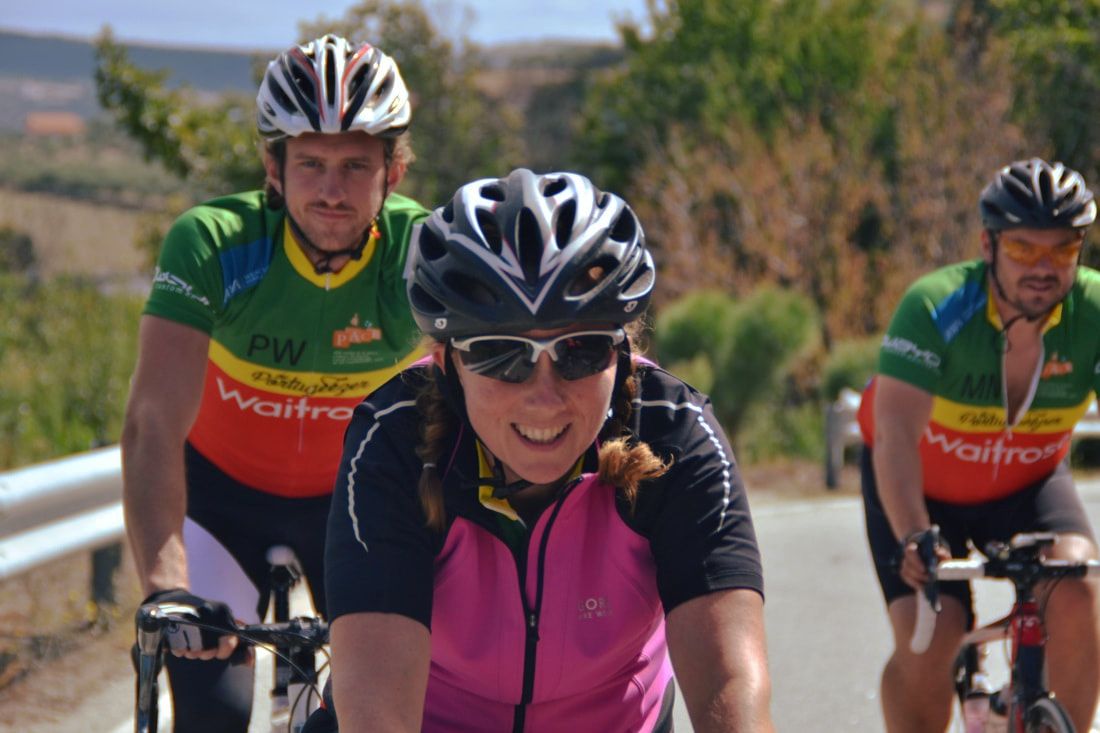 ConclusionThe more comfortable your cycling clothes are, the more likely you are to enjoy your ride for longer.
Luckily, there are plenty of ways to be comfortable while riding. From the right type of material to the right type of cycling shorts, there are plenty of things you can do to feel even better while cycling. I hope this article helped, now get out there and ride!! |


 RSS Feed
|

|
|

Cycling In Portugal |
Cycling In Spain |
Bikes & Equipment |
Follow UsFollow us on social media where we share all our special offers, news, events & more.
|
CONTACT Us |
|
Terms & Conditions | Privacy Policy | Travel Agents | Press Kit | Travel Insurance © Cycling Rentals 2022
Cycling-Rentals is a division of Cycling through the Centuries. Registered Tour Operator RNAAT nº58/2006. Registered Travel Agent RNAVT nº 5035
Cycling-Rentals is a division of Cycling through the Centuries. Registered Tour Operator RNAAT nº58/2006. Registered Travel Agent RNAVT nº 5035